🎯 Who is this for?
This article is for international students who are applying for a Certificate of Eligibility (CoE) or extension of period of stay through SpeedVisa and need to upload certificate documents as part of their application.
Understanding Upload Folders
Upload folders are created and managed by your school.
The required documents vary depending on your school, program, and application type.
If you are unsure what document should be uploaded to a folder, please contact your school directly.
If a folder does not apply to you, upload a file stating "Not Applicable (N/A)" unless instructed otherwise by your school.
📝 Step-by-step Instructions
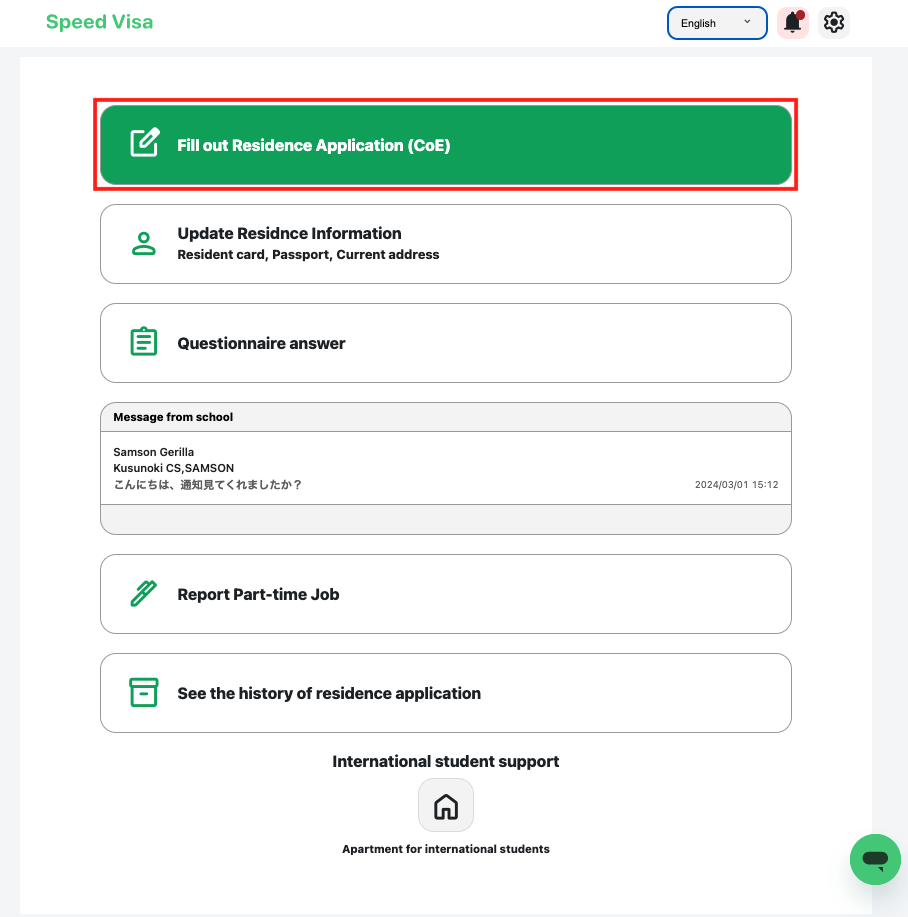
1. Access the Upload Interface
-
On your Dashboard, tap "Fill out Residence Application."
-
Select the "Upload Certificates" menu option.
2. View Upload Folders
-
Tap the "Upload Certificates" button to see folders that the school has set up for required documents.
-
Each folder will display a status like (0/9):
-
The first number indicates how many files you’ve uploaded.
-
The number in parentheses shows how many documents are required.
-

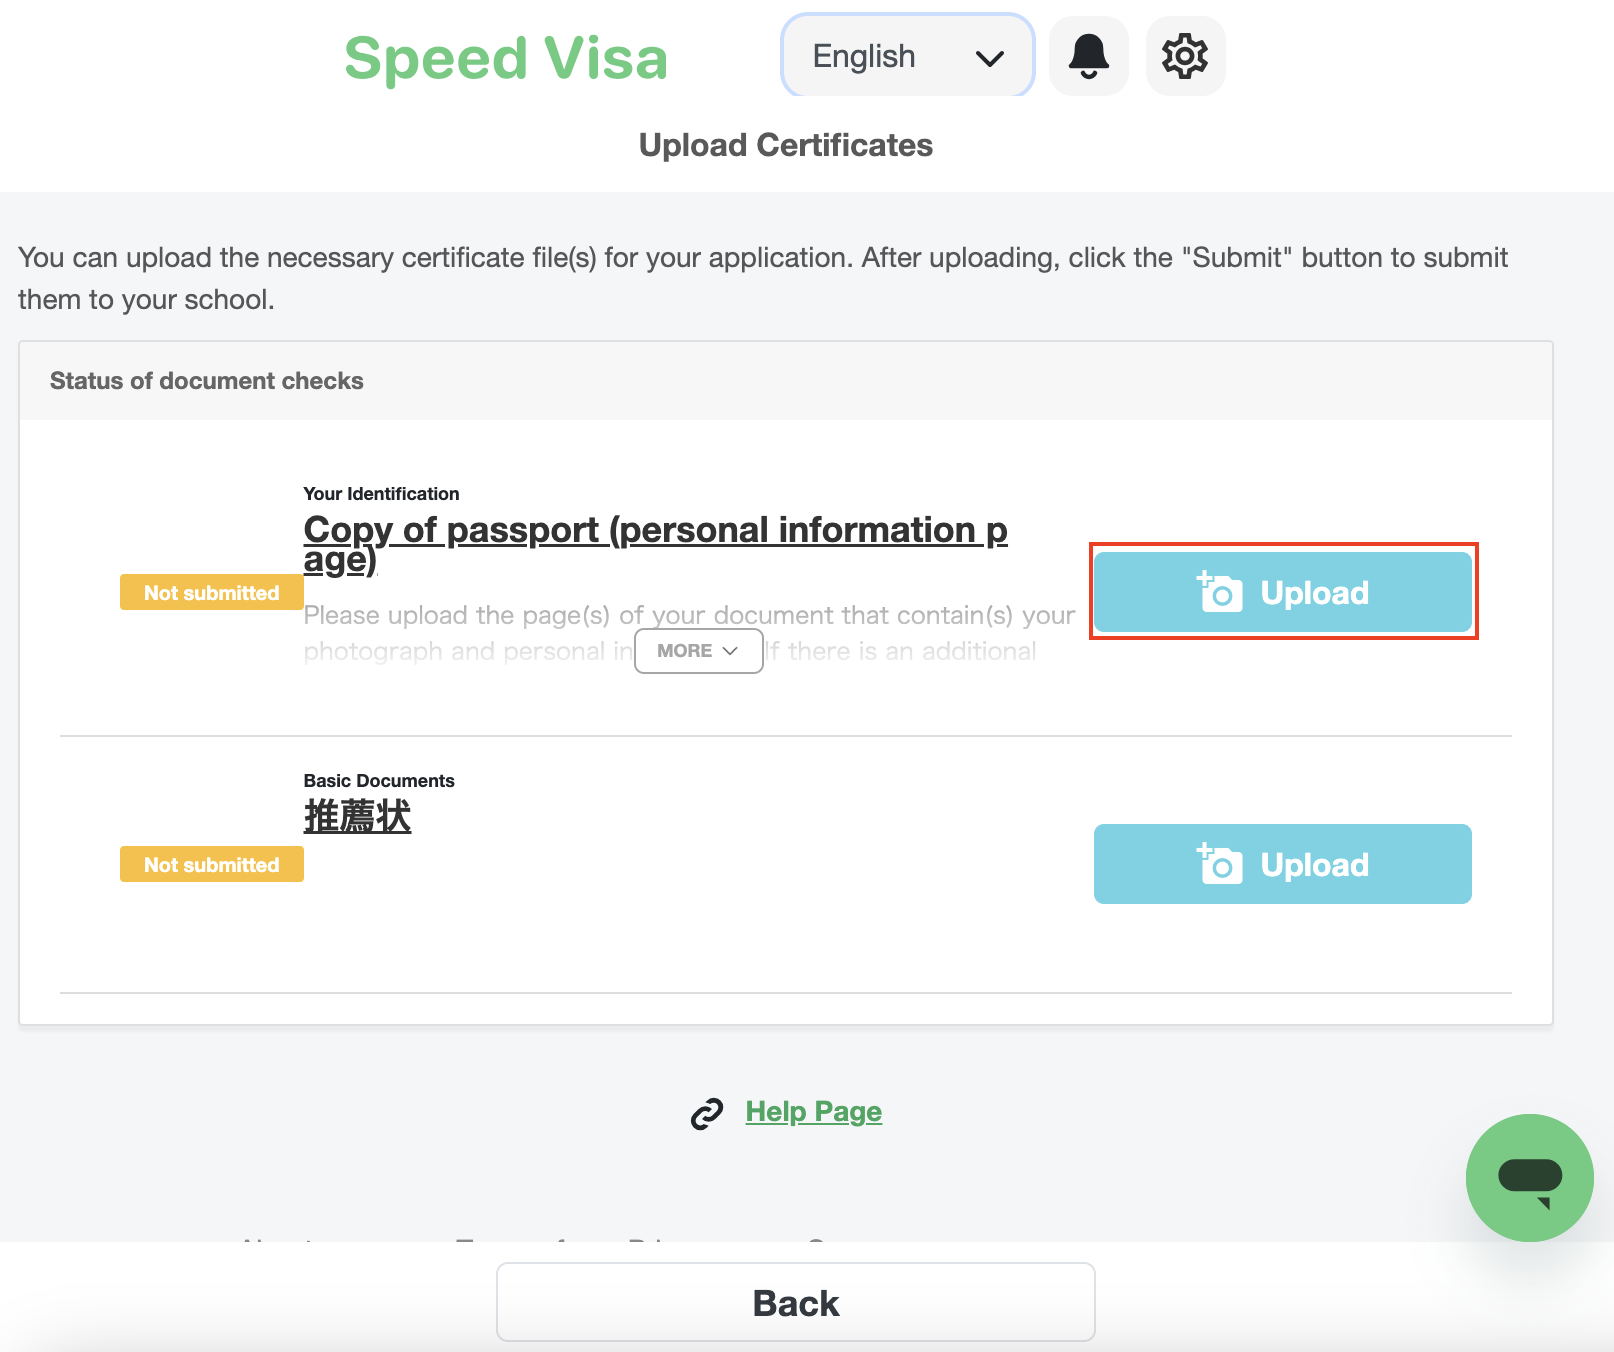
3. Upload Documents
-
Within each folder, tap "Upload".
-
Select and upload the required files.
-
✅ You can upload files in any common format, including:
-
Image files such as JPEG, PNG, GIF
-
Documents such as PDF, Word (.doc/.docx)
-
Other standard file types are also supported
-
-
Just make sure the files are not password-protected or corrupted.
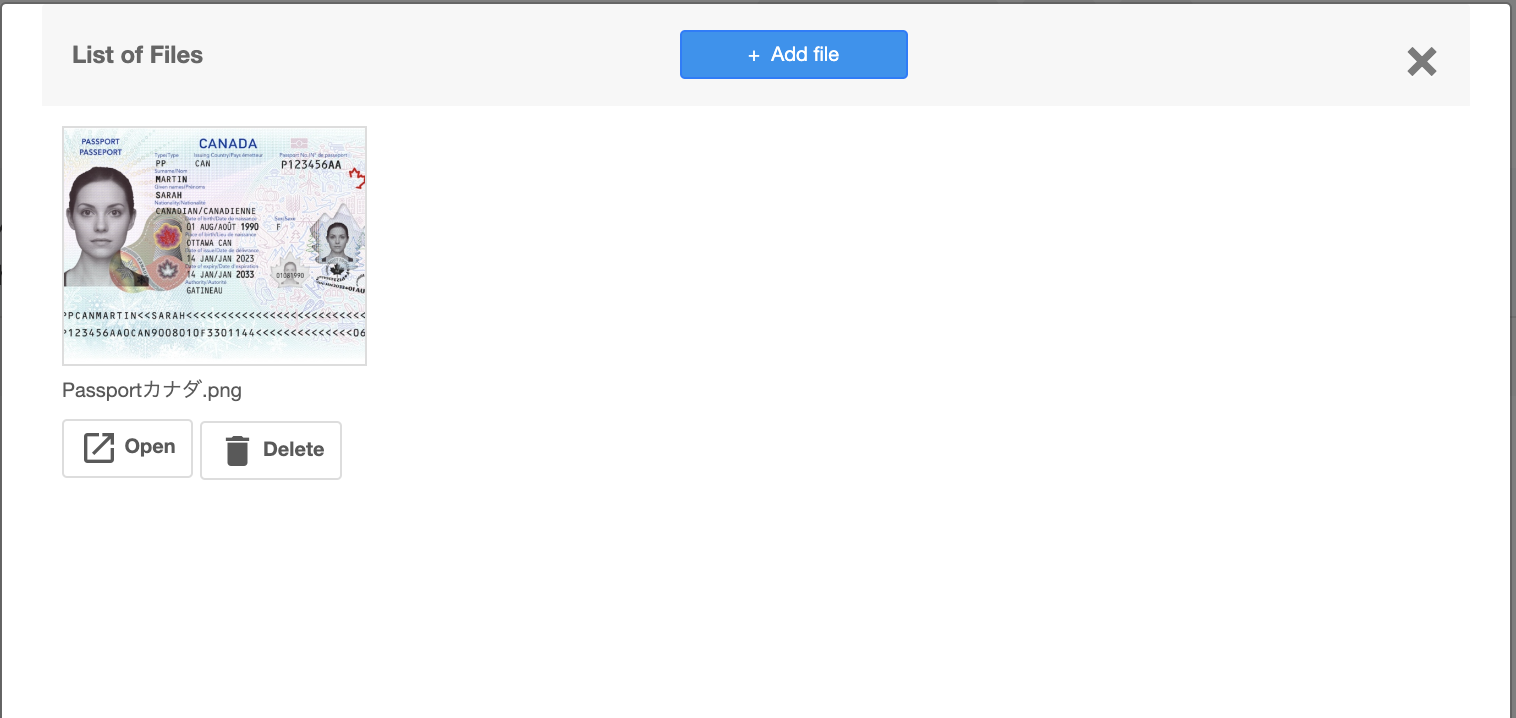
4. Preview and Close
-
Once uploaded, a preview of your file will appear.
-
To close the preview, tap the "✗" button.
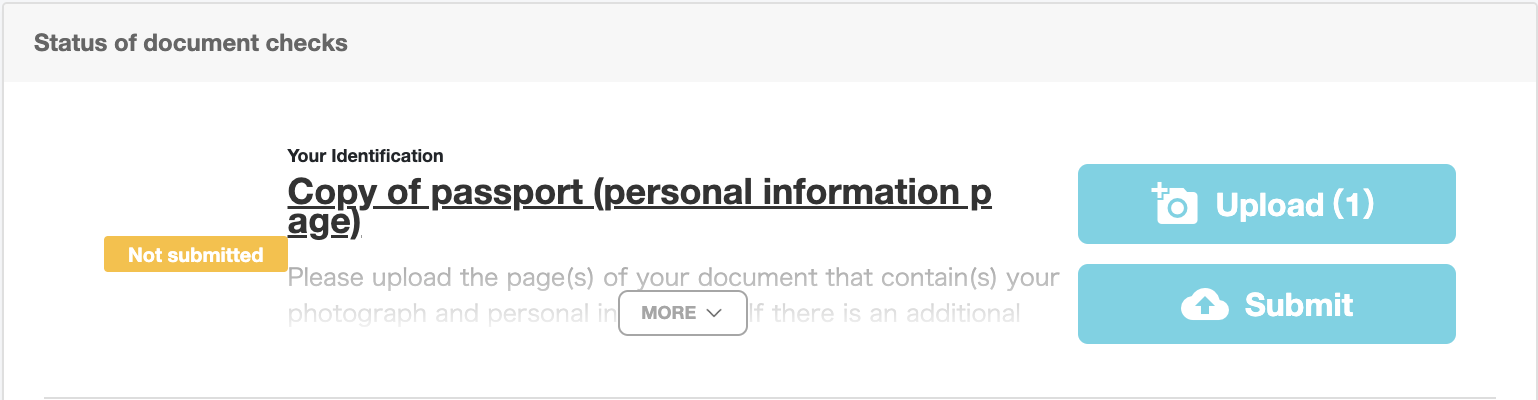
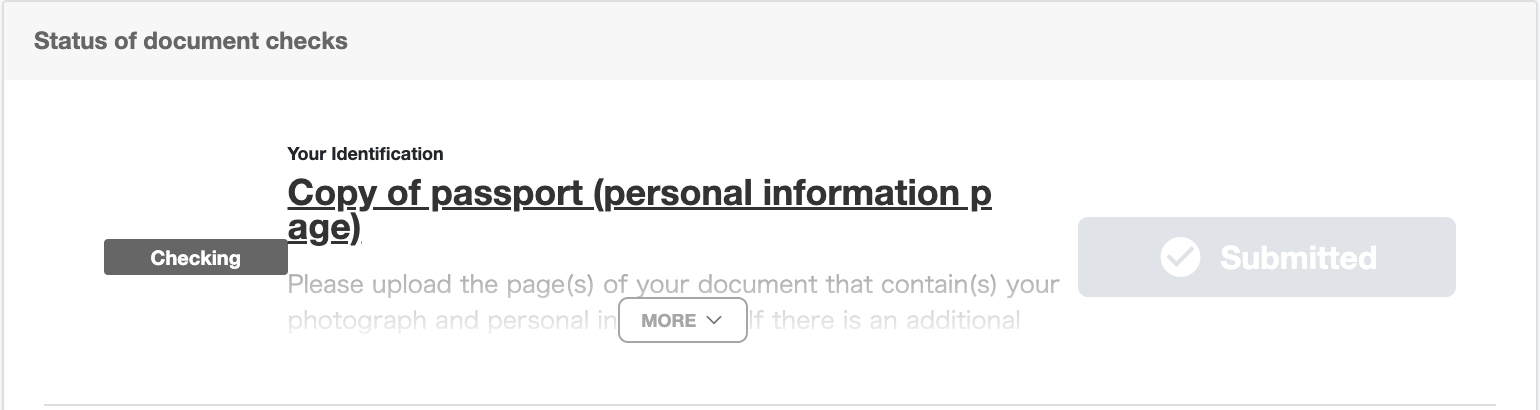
5. Submit Documents
-
After uploading, a "Submit" button will appear on each folder.
-
Tap it to send the files to your school.
-
The button will turn gray and the status will change to "Under Review", meaning the school is reviewing your submission.
- The button will turn grey, and the status will change to "Checking," indicating that the school is reviewing your documents.
📌 Understanding Folder Statuses
Each upload folder has a status that shows the progress of your document review.
| Status | Meaning |
|---|---|
| Not Submitted | The folder is empty, or files have been uploaded but the Submit button has not been pressed yet. |
| Under Review | Files have been submitted and the school has started reviewing them. You cannot add or replace files at this stage. |
| Under Final Review | The initial review has been completed and the school is performing a final check. Files cannot be added or replaced. |
| Approved | The school has completed the final confirmation of your documents. Files cannot be changed. |
| Returned | The folder has been returned by the school because corrections or additional documents are needed. You can upload replacement or additional files in this status. |
⚠️ Important:
Some schools may not update the folder status even after reviewing your documents.
For example, a folder may remain marked as Under Review even though the review has already been completed.
Because of this, you generally do not need to worry about statuses other than Returned.
If there is any issue with your documents, the school will contact you directly.
No contact from the school usually means there is no problem.
💡 FAQs / Tips
Q: What if I need to revise a submitted document?
A: Contact your school directly to request a change.
Q: What formats are accepted?
A: PDF, JPEG, and PNG are commonly used, but the system accepts files in any format.
Please ensure that your file is not password-protected and can be opened without restrictions.
Q: Can I submit older documents?
A: No. Documents must be issued within 3 months of your application date.
Q. If a file status is marked as "Under Review," do I need to wait until it changes to "Approved" before pressing the overall "Submit" button for the application?
A. No. You can proceed with the overall application submission once all required information and files have been completed.
The school will review your uploaded documents after submission and contact you if any corrections are needed.
Some schools may not update folder statuses regularly, so you do not need to wait for the status to change to "Approved."
📌 Important Notes for Document Preparation
-
Issuance Date:
Documents must be issued within 3 months of your application date. Older documents will not be accepted. -
Translation:
If a document is written in a foreign language (including English), attach a Japanese translation. -
Document Details:
All documents must include:-
Name and title of the issuer
-
Contact details (address, phone, fax, email) of the institution
-
Signature and seal (if available)
-