🎯 Who is this for?
International students who are filling out their application for Certificate of Eligibility (CoE) on SpeedVisa and need help entering the "Basic Information" section.
📝 Step-by-step Instructions
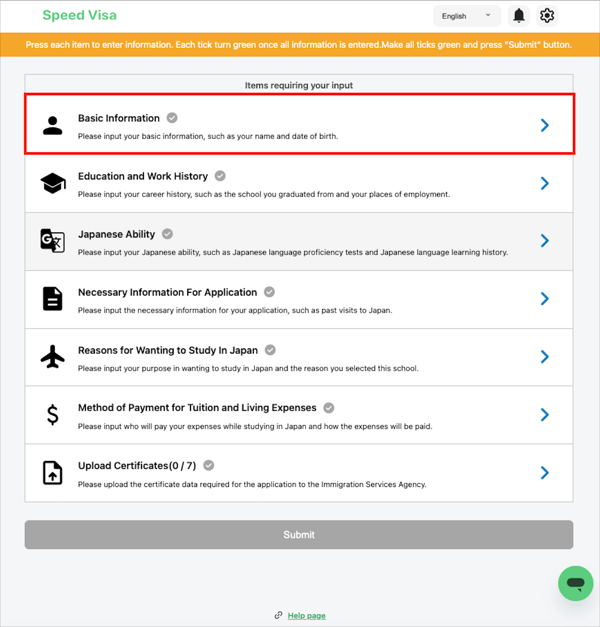
1. Access the Basic Information Section
-
Log in to your SpeedVisa account.
-
Tap the "Apply for Residence Status" menu
-
Tap the “Basic Information” option from the dashboard menu.
-
This section must be completed in full to receive a green check mark, indicating it is finished.
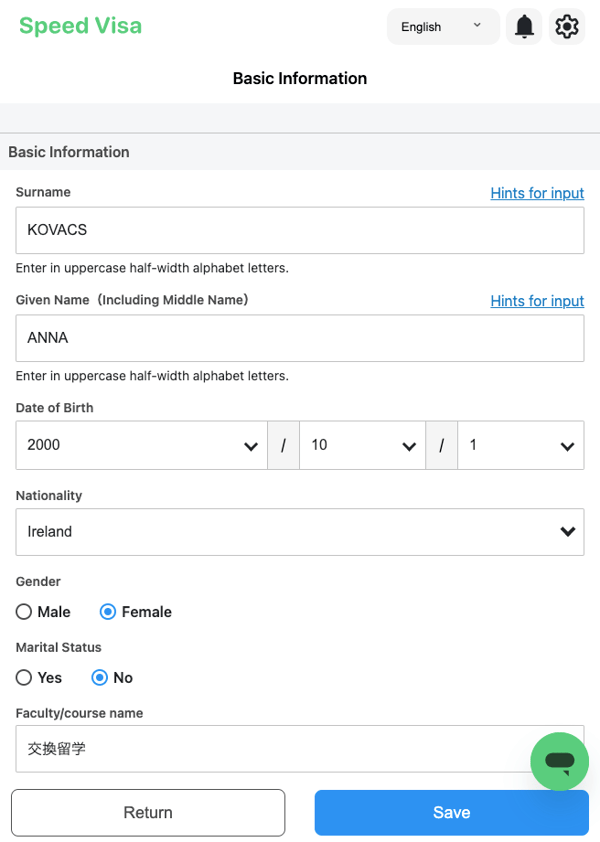
2. Fill Out Required Fields
🔹 Name
-
Enter your full name exactly as it appears on your passport, using alphabet letters.
-
Do not use nicknames or non-official spellings.
🔹 Date of Birth
-
Tap the field and scroll to select your year, month, and day.
-
Double-check the accuracy before saving.
🔹 Nationality
-
Choose your nationality from the dropdown list.
🔹 Gender
-
Select the gender shown on your passport.
🔹 Marital Status
-
Select “Yes” if you are married, “No” if you are not.
🔹 Faculty / Course Name
-
Choose the name of your current faculty or course at school.
- You cannot enter the information directly.
- If no options are displayed, it is likely that the school has not configured the choices yet:
Related article: Faculty/Course Name: What to Enter and How to Fix Save Issues
🔹 Occupation
-
Select your current occupation from the dropdown list:
-
Student
-
Preparing to study abroad
-
Company employee
- Others
-
3. Upload Your Photo for Official Use
-
Upload a recent photo (taken within the last 6 months) in PNG, JPG, or JPEG format.
-
Photo requirements:
-
Face forward, with no sunglasses or hats
-
Plain background (no objects behind you)
-
-
If you must wear special attire for religious or medical reasons, ask your school for approval.
4. Passport Information
-
If you have a passport, select “Yes” and enter:
-
Passport Number
-
Expiration Date
-
-
If you do not have a passport, select “No.”
5. Career Path After Graduation
-
Select the option that best describes what you plan to do after graduating (e.g., finding a job, continuing studies).
6. Residence Card Information
(Only for students applying for a period extension)
Enter the following:
-
Residence Card Number
-
Expiration Date
-
Current Period of Stay
-
Desired Period of Stay
-
Reason for Extension
-
Example: “To continue studies at ○○ School.”
-
📌 Note:
For “Desired Period of Stay,” enter the time until your graduation. If you have been accepted to a new school, use the graduation date of that new school.
7. Contact Details
🔹 Phone Number
- Select country code from the dropdown list
-
Enter your phone number (Only numbers can be entered)
🔹 Emergency Contact
-
Provide details of someone who can be contacted in an emergency, including their relationship to you and phone number.
🔹 Current Address
(Only for period extension applicants)
-
Enter your current address as written on the back of your Residence Card.
💡 FAQs / Tips
-
💾 Tap the “Save” button often to avoid losing progress.
-
✅ A green check mark means the section is complete.
-
🔙 Use the “Back” button to return to the main menu of sections.
-
📷 Prepare your photo and official documents before starting to make the process smoother.
🧭 Related Links